Main Features of the App
Arccaptain APP Installation and Operation Guide
Device Connection
Allows location and Bluetooth permissions to search and connect to nearby Arccaptain welding devices.
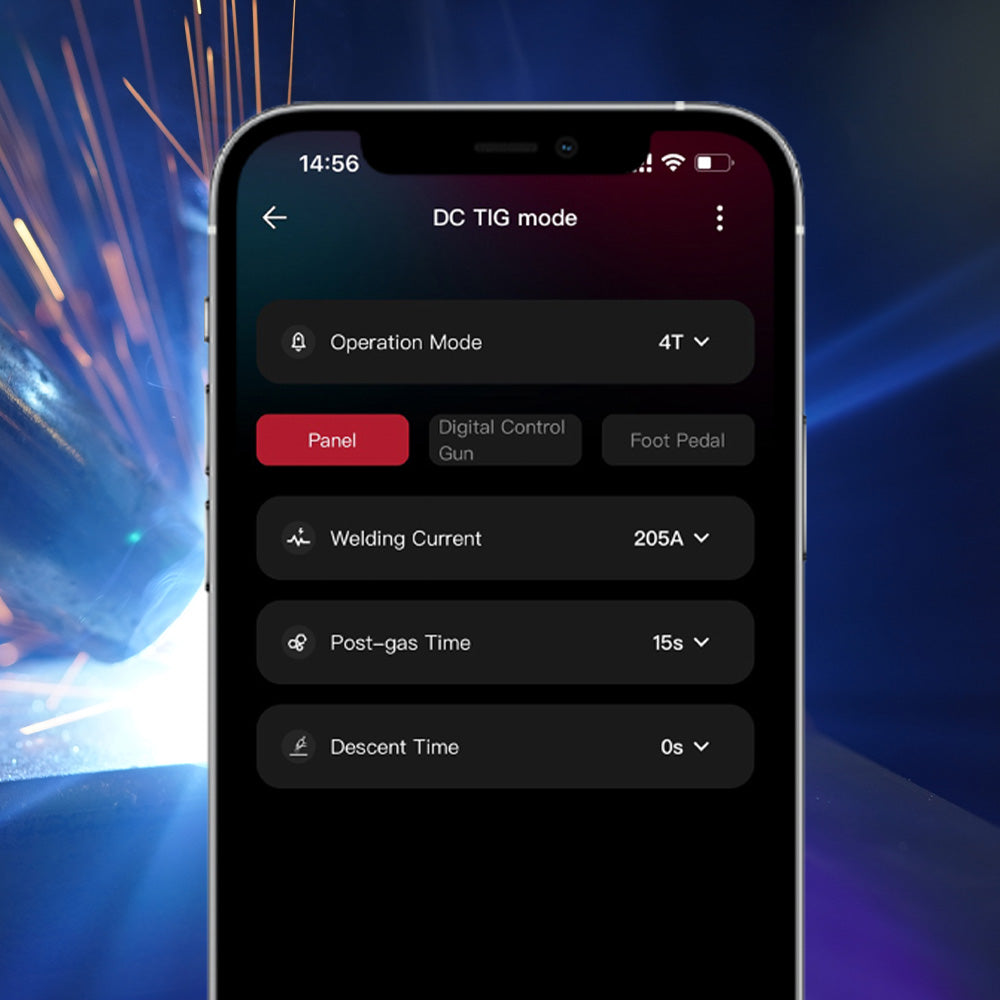
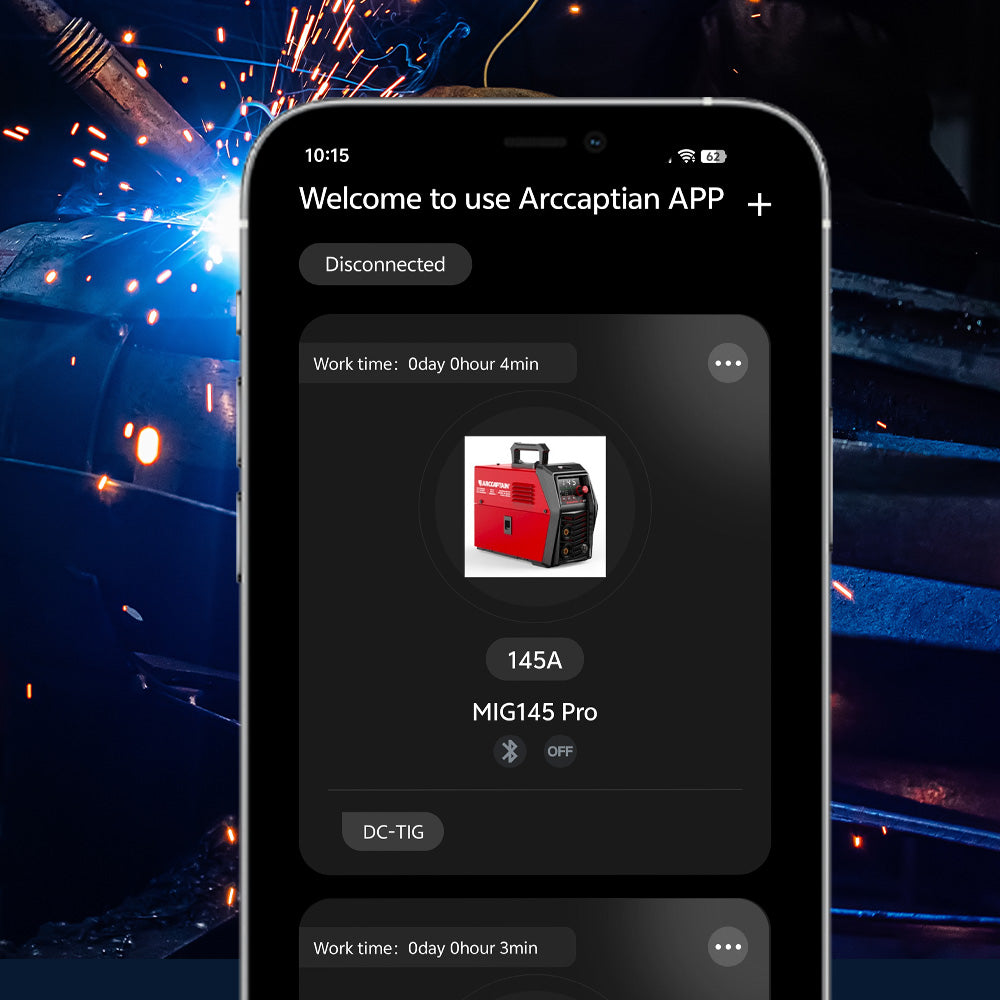
Welding Machine Status
Displays the working status and mode of the welding machine.
Providing warnings for safety issues.
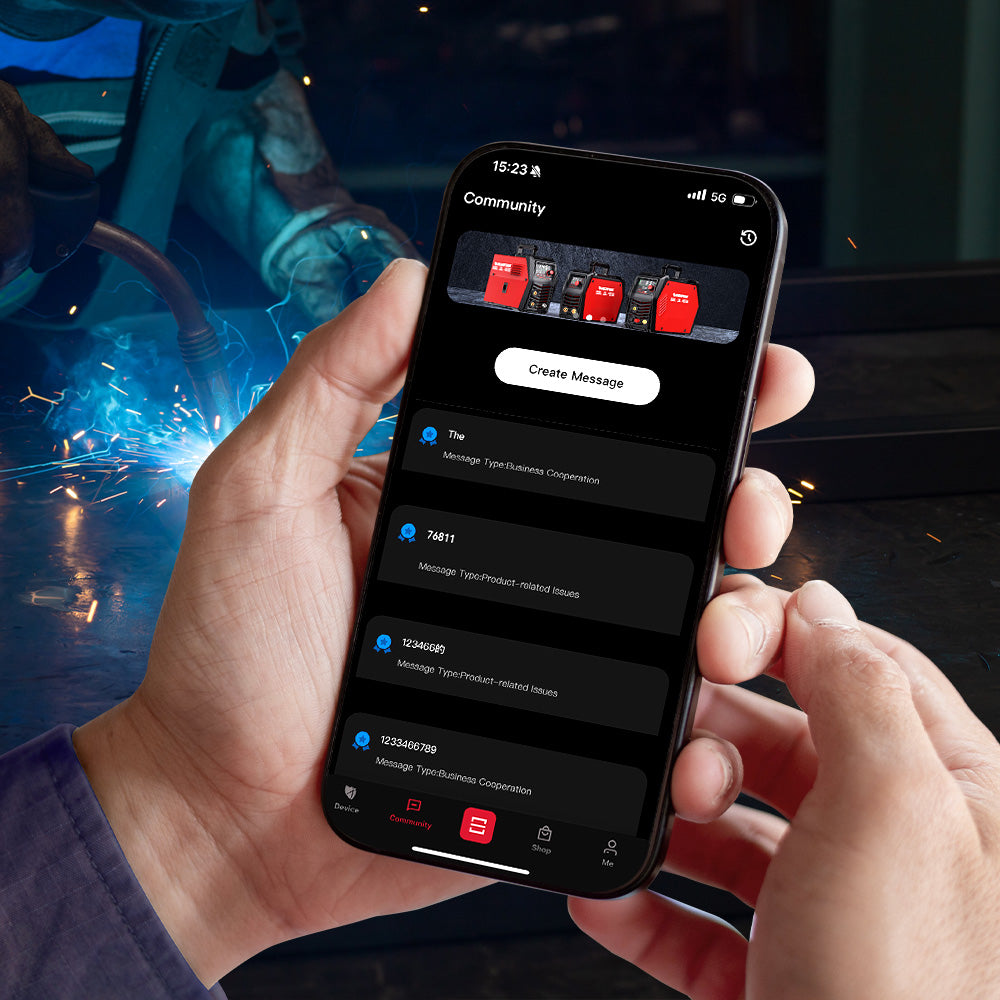
Community Interaction
Post questions, share experiences, and interact with other users and customer service.
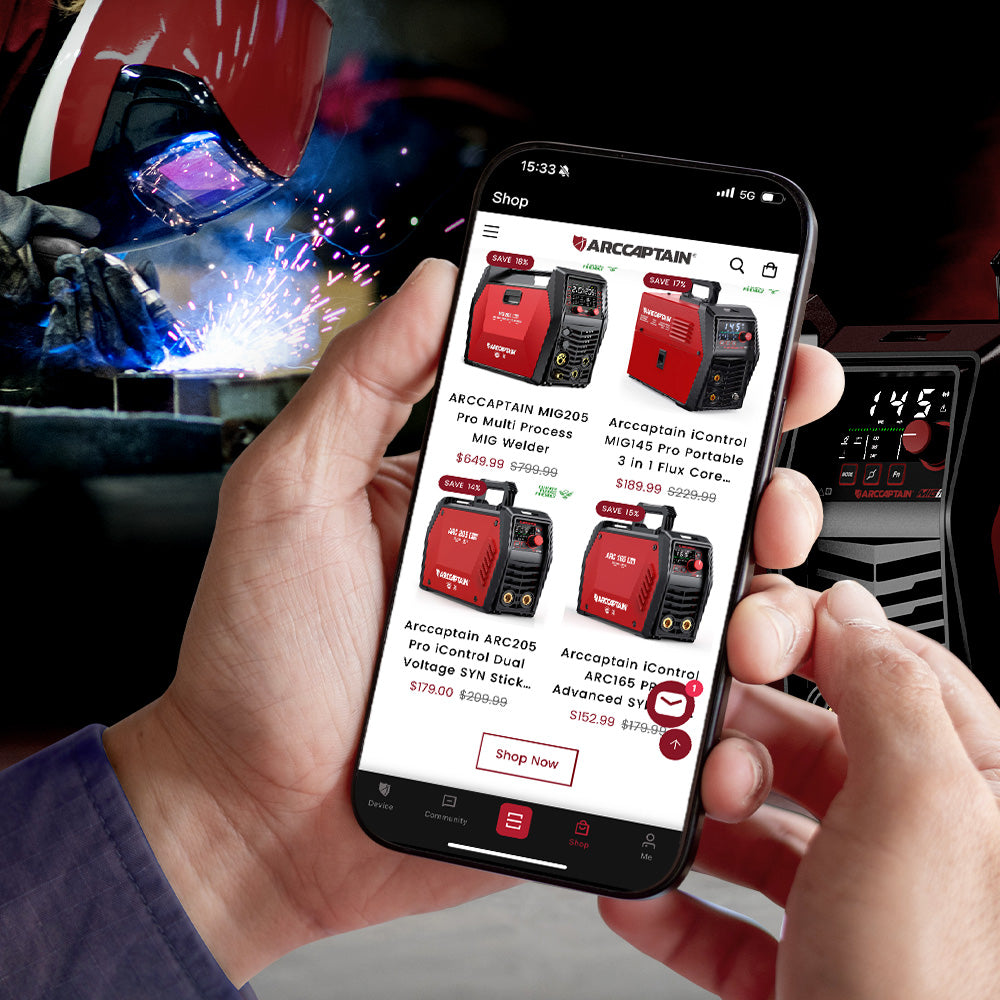
Shopping Mall
Browse and purchase welding machines and accessories, and check order status.
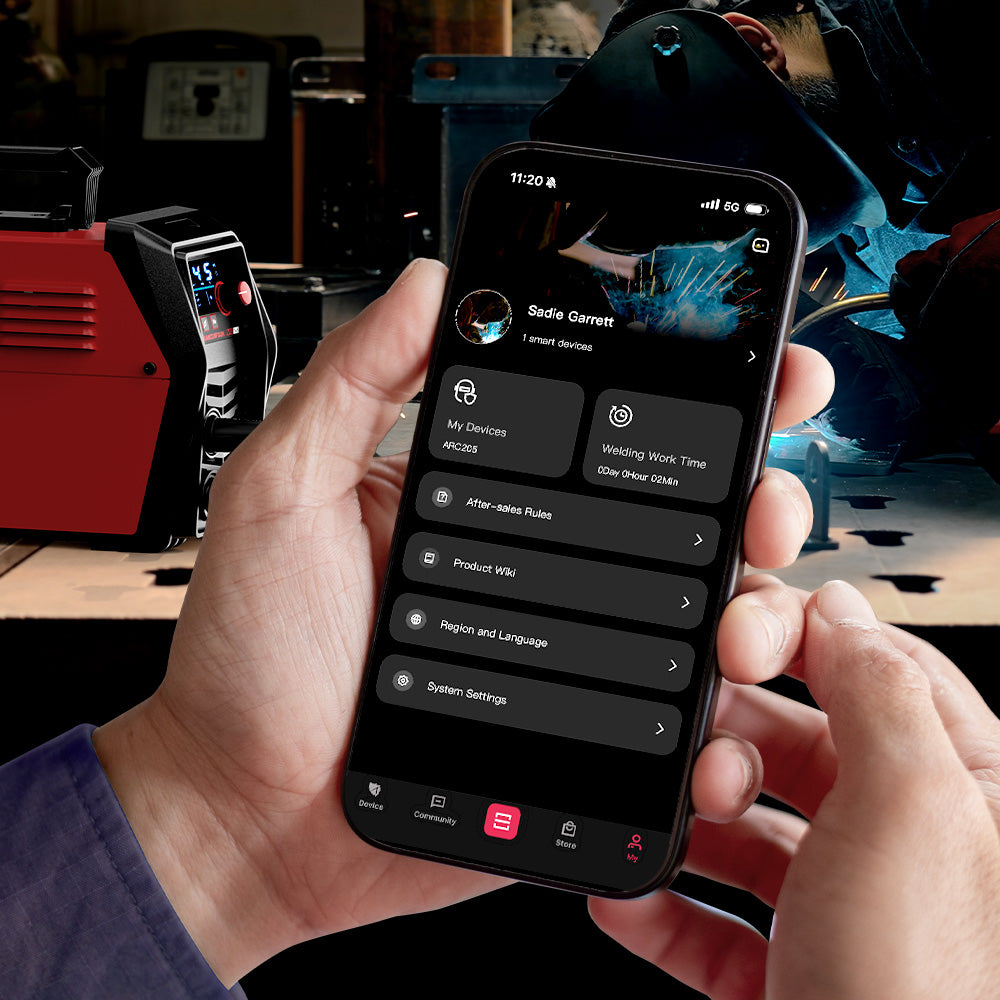
Personal Center
Manage personal information, view devices and working hours, and understand the after-sales service process.
Arccaptain APP Installation and Operation Guide
1. Installation Steps
(I) Android System
1. Open the "App Store" of your phone (such as Google Play App Market, Amazon App Store, Samsung App Store, etc.).
2. Enter "Arccaptain" in the search bar of the App Store.
3. Find the corresponding APP in the search results and click the "Install" button.
4. Wait for the download and installation process to complete. After the installation is complete, you can find the APP icon on the mobile phone desktop.
5. Scan the QR code to download and install (with the latest version QR code)
(II) Apple System (iOS)
1. Open the "App Store".
2. Click the "Search" button at the bottom of the screen and enter "Arccaptain" in the search box.
3. Select the correct APP from the search results and click the "Get" button. If necessary, you may also need to enter your Apple ID password or use face recognition/fingerprint recognition for confirmation.
4. After the download is complete, the APP will be automatically installed. After the installation is successful, you can find the APP icon on the home screen.
2. First-time operation
1. Click the Arccaptain icon on the mobile phone desktop to start the APP.
2. When you open the APP for the first time, some permission requests may appear, such as Bluetooth permission (for connecting to the welding machine), location permission, storage permission (for saving relevant data and pictures, etc.). Please choose to allow or deny the relevant permissions according to your needs and the degree of trust in the APP. [Bluetooth permission] is crucial for subsequent connection operations with the welding machine. If it is rejected, the connection to the welding machine function may not be used normally.
3. After entering the APP, you can browse the relevant introduction on the guide page to understand the main functions and features of the APP, including Bluetooth connection to the welding machine for working mode and parameter settings, community interaction, mall shopping, and equipment management and working time viewing in the personal center.
4. Next, you need to register an account or log in to an existing account. If you choose to register an account, you generally need to enter your mobile phone number or email address, set a password according to the prompts, and then complete the registration process according to the verification code sent by the system. If you already have an account, just enter your account and password to log in.
3. Common problems and solutions
(I) Installation problems
1. **Installation failed**:
- Check whether the mobile phone network connection is normal, try to switch to a stable Wi-Fi network and reinstall.
- Check whether the mobile phone storage space is sufficient. If not, clean up some unnecessary files or applications and try to install again.
- Check whether the downloaded APP installation package is complete. If it is damaged, delete the downloaded installation package and search and download it again in the app store.
- Some Android phones may prohibit the installation of apps from unofficial app stores due to system settings. Please go to "Settings - Security and Privacy - Install unknown apps" on your phone and allow installation from the corresponding app store or installation package source.
(II) Usage Problems
1. **Bluetooth connection failure**:
- Check whether the Bluetooth function of the welding machine is turned on normally and is in a searchable state. If the Bluetooth function of the welding machine is abnormal, please refer to the user manual of the welding machine for troubleshooting or contact the customer service staff of Arccaptain Welding Machine Manufacturing Company for help.
- Make sure that the Bluetooth function of the mobile phone is turned on, and when clicking "Search Device" on the Bluetooth connection page of the APP, the distance between the mobile phone and the welding machine should not be too far. It is generally recommended to be within 10 meters to avoid signal interference or connection failure caused by too long a distance.
- If you still cannot connect after multiple attempts, try to turn off the Bluetooth of the mobile phone and the welding machine, then turn them back on and connect again. At the same time, check whether there is any Bluetooth-related update for the mobile phone system. If there is an update, it is recommended to update it before trying to connect.
- If the problem persists, it may be that the APP version is incompatible with the Bluetooth module of the welding machine. Enter the App Store, search Arccaptain, and check if there is an update available. If there is an update prompt, click the update button to update and try to connect again.
2. **Working parameter settings cannot be applied to the welder**:
- Confirm that the welder has been successfully connected and the connection status is stable. If the connection is unstable, the parameter settings may not be correctly transmitted to the welder. After checking the connection status, if there is a problem with the connection, follow the solution for Bluetooth connection failure.
- Check whether the set working parameters are within the parameter range supported by the welder. Different models of Arccaptain welders have different restrictions on working parameters. If the set parameters are out of range, the welder will not accept the settings. Check the value range prompts of the parameters in the corresponding working mode in the APP, and check with the product manual of the welder. Adjust the parameters and try to apply the settings again.
- If the above conditions are normal, but the parameters still cannot be applied, try restarting the welder and mobile phone APP. Sometimes the device or software may have temporary failures, and restarting can solve some minor problems. After restarting, reconnect the welder and set the parameters for application.
3. **Mall payment issues**:
- Check whether the network connection is normal. The payment process requires a stable network environment. If the network is unstable or interrupted, payment may fail. Try switching to a stable network (such as Wi-Fi) and then retry the payment operation.
- Confirm whether the payment method you selected has been opened and the account balance is sufficient (such as sufficient balance on the bank card, sufficient funds in the PayPal account, or a valid payment method has been bound). If there is a problem with the payment method, such as an expired bank card, no real-name authentication, etc., please follow the prompts of the corresponding payment platform to handle it, such as updating bank card information, completing real-name authentication, etc., and then try to pay again.
- If an error message appears during the payment process, such as "payment system busy" or "order processing failed", do not repeat the payment operation frequently to avoid repeated deductions. After a while, check the "My Order" page in the APP to confirm whether the order status has been updated. If the order status is still unpaid and the payment amount has not been deducted, you can try to pay again; if the payment amount has been deducted but the order status has not been updated, contact the mall customer service staff and provide information such as the order number, payment time, and payment amount. The customer service staff will assist you in processing the order status and verify the payment status to ensure that the transaction is completed smoothly.
4. **Community content publishing failed**:
- Check whether the network connection is normal. If the network is unstable or interrupted, it may cause the content to fail to be published. Try to switch to a stable network environment and publish again.
- Confirm whether your account has completed real-name authentication or whether there is any violation that has restricted publishing permissions. If you suspect that your account is restricted, contact the APP customer service staff and provide relevant account information so that they can help solve the problem.
- Check whether the content you want to publish complies with the community regulations, such as whether it contains illegal, illegal, advertising or malicious information. If the content does not comply with the regulations, modify the content and republish it.
4. APP main interface function introduction and operation
(I) Home device connection
1. **Click to connect device**: Located in the center of the screen, after clicking, the APP needs you to allow access to location information and Bluetooth permissions. You can choose whether to enable permissions according to your needs. If you refuse Bluetooth permissions, the device may not be connected normally. After authorization is allowed, the APP will search for nearby Bluetooth welding devices. You can view nearby Arccaptain welding devices in the search device list, select the device you want to connect, and click the icon to initiate the connection. After the connection is successful, the status and working mode of the device can be viewed on the home page.
2. **Welding machine status function area**: When you have connected a welding machine, this area will display the current working status and working mode of the welding machine. You can select the required working mode to enter the welding machine working parameter debugging. Such as whether welding is in progress, the current and voltage supported by the welding machine and other basic parameter information. If there is a safety problem with the welding machine, this area will display the warning information in a striking color and warning icon. You can click this area to quickly view the detailed description of the safety problem and solution suggestions.
(II) Welding machine connection
1. Click the "welding machine connection" button in the navigation bar to enter the welding machine connection page.
2. Make sure your welding machine has turned on the Bluetooth function and is powered on, and is in a searchable state. Click the "Search Device" button in the APP, and the APP will start scanning nearby Bluetooth devices.
3. Find the name of your Arccaptain welding machine in the scan result list and click to pair and connect. After the connection is successful, the "connected" status will be displayed on the page, and you can see some basic information about the welding machine, such as the welding machine model, serial number, etc.
4. After the connection is successful, click the "Enter Work Settings" button to enter the work mode and parameter setting page. Here, you can select a suitable mode from the preset multiple working modes, such as MIG mode, TIG mode, CUT mode, etc. After selecting the working mode, a pop-up window will appear below to display the wiring diagram of the mode. After entering the working mode, the adjustable working parameters, such as welding current, welding voltage, welding speed, etc., can be set by sliding the slider or entering specific values. After the setting is completed, the parameter settings will be sent to the welding machine, and the welding machine can start working according to the mode and parameters you set.
(III) Community
1. Click the "Community" button in the navigation bar to enter the community page.
2. The community page will display other users' experience, tips, problem feedback, and requirements for welding machine function improvement.
3. If you want to publish content, click the "Create a message" button in the center of the page. You can choose the type of posting, such as asking questions, sharing experiences, and proposing functional requirements, and then write detailed content in the text box. You can upload relevant pictures (such as photos of the welding machine working site, photos of fault phenomena, etc.) to assist in the explanation. Finally, click "Publish" to share your content in the community and interact with other users and Arccaptain welding machine manufacturing company. The customer service staff or technicians of the manufacturing company will regularly check the community content, answer questions raised by users, and collect and organize functional requirements for subsequent product improvements.
(IV) Mall
1. Click the "Mall" button in the navigation bar to enter the mall page.
2. The mall page is divided into "Welding Machine Products" and "Welding Machine Accessories" and other classification sections. In the "Welding Machine Products" section, you can browse various models of Arccaptain brand welding machines. Click on a specific welding machine product to view detailed product introductions, technical parameters, user reviews, prices and other information. If you decide to buy, click the "Add to Cart" button and then enter the shopping cart page to check out. In the "Welding Machine Accessories" section, you can find various accessories that match the Arccaptain welding machine, such as welding gun heads, cables, shielding gas regulators, etc. The purchase process is the same as for welding machine products.
3. On the shopping cart page, you can view the list, quantity, total price and other information of the selected products. After confirming that they are correct, click the "Checkout" button, fill in the delivery address, contact information, and select the payment method (such as PayPal, bank card payment, etc.) according to the prompts. After completing the payment, you will receive an order confirmation message. You can check the order status and logistics information in "My Orders" in the Mall-Personal Center.
4. Visit the mall in other browsers and enter: https://www.arccaptain.com in the address bar
(V) Personal Center
1. **Personal Information Management**: Click the avatar area on the Personal Center page to enter the personal profile editing page. Here you can upload a new avatar photo, click the "Select Photo" button to select a suitable picture from the mobile phone album to upload; when editing the user nickname, directly modify it in the nickname input box, and click the "Save" button after the modification.
2. **View Device**: In the "My Device" section, the Arccaptain welding machine equipment information you have connected will be listed, including the device name, model, connection time, etc., so that you can quickly view the paired devices.
3. **View Working Hours**: The "Welding Working Hours" area clearly displays the cumulative welding working hours statistics of your use of the welding machine, allowing you to intuitively understand your working hours, which is helpful for work arrangement and efficiency evaluation.
4. **View the customer after-sales service process**: Click the corresponding option to view the detailed customer after-sales service process description, including the steps for after-sales application, return and exchange policy, maintenance service outlet query and other information, so that you can clearly understand how to operate when you need after-sales support.
5. **View the product encyclopedia**: Click to enter the product encyclopedia submodule, which contains the operation guide and FAQs of various models of Arccaptain welding machines. You can find the required information by searching keywords or browsing the category catalog. For example, if you encounter problems when operating a certain model of welding machine, enter relevant keywords, such as "[Specific model] welding parameter setting", and the product encyclopedia will present the corresponding operation methods and suggestions to help you quickly solve the problem and use the welding machine correctly.
6. **Select region and language**: Click the "Language and region" option. In the pop-up list, you can select the language displayed by the APP, which supports switching between English, Chinese, French, and Spanish. At the same time, you can also set your region to obtain more accurate localized services.
7. **System Settings**:
- **Account and Security**: Click "Account and Security" to enter and modify the password. Enter the original password and the new password and confirm. Click "Save" to complete the password modification. When modifying the bound email address, first enter the new email address, and then follow the verification code sent by the system to complete the email change.
- **View User Agreement**: Click this item to view in detail the content of the user agreement you have reached with Arccaptain when using the APP, including important information such as the rights and obligations of both parties and privacy protection terms.
- **View Privacy Policy**: Understand how the APP collects, uses, stores and protects your personal information, so that you have a comprehensive understanding of privacy and security.
- **View Current Version Number**: Here you can know the APP version information you are currently using, so as to compare it with the latest version and determine whether it needs to be updated.
- **Clear Cache**: If the APP is stuck or the storage usage is too high, you can click the "Clear Cache" button to clean up some temporary data, free up mobile phone storage space, and improve the running speed of the APP.
- **Check for the latest version**: Click this function, and the APP will automatically check whether there is a new version available for update. If there is an update, you will be prompted to download and install it. Follow the prompts to complete the APP update to get new features, fix vulnerabilities and improve performance.
- **Deregister account**: If you decide not to use the APP anymore, you can choose to deregister your account. After clicking "Deregister account", the system will prompt you to confirm the operation, because the account and related data cannot be restored after deregistration, please operate with caution. After confirming the deregistration, follow the system process to complete the deregistration process.
- **Log out**: Click the "Log out" button to log out of the current account and return to the APP login page to ensure the security of your account. It is recommended to log out in time after logging in using a public device or other people's devices.


