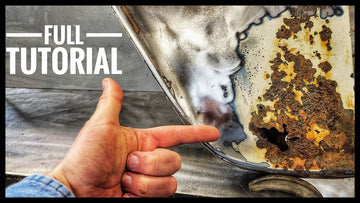
Welcome to the garage, where magic happens with metal, sparks fly, and the smell of fresh paint is just around the corner. Today, we're diving headfirst into a task that many dread but is undeniably rewarding: rust repair. Yes, you heard that right. We're tackling the rust on a vintage gem, a 1965 C10, affectionately named Patches. Now, Patches has seen better days, with a patina that tells stories of its past adventures and, unfortunately, rust that whispers tales of neglect.
Tip: If you would like to learn more about MIG welding beginner techniques, please click the link below.
Pt1. Learn to MIG Welding Run A Bead
Pt2. Learn to Mig Weld Tubing to Plate
Pt3. Learn to MIG weld thin square tubing
Pt4. Learn to MIG weld ANGLE Iron
Pt5. Learn to MIG weld Stack Dimes In a Day
Understanding Rust and Its Challenges
Rust, the ever-persistent foe of metal, creeps up silently but can wreak havoc on even the most robust vehicles. It's a classic car enthusiast's nightmare, turning pristine metal into Swiss cheese. The battle between replacement and repair is an old one, with arguments for both sides. But today, we're focusing on repair. Why? Because there's a certain satisfaction in breathing new life into original parts, preserving the soul of the vehicle.
Preparing for the Repair
Before we dive into the repair, let's get our ducks in a row. Assessing the damage is crucial; it sets the stage for the work ahead. For Patches, the fender bore the brunt of the rust. Armed with a checklist of tools and materials, from the humble hammer to the trusty MIG welder, we're set for the task. Remember, the right tools not only make the job easier but also ensure a repair you can be proud of.
Step-by-Step Repair Process
Cutting and Removing the Rust
First things first, identifying and marking the rusted area is crucial. It's not just about cutting out the rust but understanding the extent of the damage. With precision, we remove the affected metal, ensuring not to compromise more of the fender than necessary. It's like surgery for cars, where every cut matters.
Creating a Patch Panel
Now, here's where the fun begins. Choosing the right metal thickness is critical – too thin, and it won't hold; too thick, and it's a nightmare to shape. We opted for a slightly thicker gauge, giving Patches the strength it deserves. Shaping the patch to fit perfectly requires patience and skill, molding the metal like clay to match the fender's contours.
Fitting and Welding the Patch
With the patch shaped and ready, it's time to fit it into place. This stage is akin to fitting a puzzle piece, where every millimeter counts. Welding is next, a process that demands precision and control. The goal? A seamless weld that leaves no trace of the repair, blending the new with the old effortlessly.
Finishing Touches
The final leg of the journey involves grinding and smoothing the welds, preparing Patches for a fresh coat of paint. It's a meticulous process, ensuring the surface is as smooth as glass, ready to face the world anew.
Matching the Patina
Here's the challenge: blending the repair with Patches' existing patina. It's an art form, creating a symphony of colors and textures that tells a coherent story. The technique involves layers of paint, sanding, and a keen eye for detail, ensuring the new repair melds into the old without a hitch.
Preventive Measures and Maintenance
Preventing future rust is just as important as the repair itself. Regular maintenance, protective coatings, and a keen eye can keep rust at bay, preserving the beauty and integrity of classic vehicles like Patches.
Conclusion
Rust repair is not for the faint-hearted. It's a battle of wills, pitting man against metal. But the satisfaction of saving a piece of history, of giving new life to a classic car, is unparalleled. It's a reminder of why we pour our hearts and souls into these machines, preserving them for generations to come.
FAQs
1. Can any rusted part of a vehicle be repaired?
Almost any part can be repaired with the right tools and skills, though sometimes replacement is more cost-effective.
2. How do I know if I should repair or replace a rusted part?
Assess the extent of the damage and consider the part's availability and cost. If the integrity of the part is compromised, replacement might be the best option.
3. What are the best tools for DIY rust repair?
A good welder, grinders, hammers, and metal shaping tools are essential for quality rust repair.
4. How can I prevent rust in the first place?
Regular maintenance, including washing and waxing, inspecting for and addressing chips or scratches, and applying rust protectant, can prevent rust formation.
5. Can I match the patina on my classic car after a repair?
Yes, with
