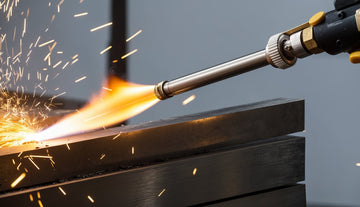
A detailed TIG torch diagram is vital for mastering Tungsten Inert Gas welding. By understanding the anatomy of you TIG torch—from tungsten electrode to ceramic cup—you'll gain the knowledge to operate efficiently and troubleshoot effectively.
Each component works together to deliver the precise control that makes TIG welding superior for critical applications. Whether you're a beginner or professional, knowing your torch's exact layout enhances welding quality and efficiency.
Ready to transform your welding skills? Read on to explore each component and become the expert your projects deserve.
Basic TIG Torch Diagram: Breakdown of Key Parts

A TIG torch has several important parts that work together during welding. Understanding these components helps you use your torch better and troubleshoot problems when they happen.
Torch Body and Handle Components
The torch body is the main structure that holds all parts together. It's usually made of durable materials like brass or stainless steel that can handle heat.
The handle attaches to this body and is designed for comfort during long welding sessions.
Most handles have a rubber or silicone covering. This helps you grip the torch better. It also provides insulation against heat and electricity.
Modern TIG torches come with switches built into the handle. These let you control the current without using a foot pedal.
Some advanced models have buttons to adjust settings mid-weld.
Inside the body, there are channels for gas flow and electrical connections. These paths must stay clean for proper torch function.
Collet and Collet Body Assembly
The collet system holds the tungsten electrode firmly in place. The collet is a small metal sleeve that grips the electrode. It comes in different sizes to match electrode diameters (usually 0.040" to 1/8").
The collet body (sometimes called a collet holder) is what the collet fits into. It screws into the torch body and creates the electrical connection between the electrode and power source.
When you tighten the back cap, it pushes the collet into the tapered collet body. This creates the clamping action that holds the tungsten.
This assembly must be clean and properly tightened. A loose collet can cause the electrode to slip during welding. This might ruin your weld or damage the torch.
Tungsten Electrode Placement and Selection
The tungsten electrode carries the current that creates the arc. It should extend beyond the collet about 2-3 times the electrode diameter. Too much extension can cause the tungsten to melt or break.
Different metals require different tungsten types:
-
Pure tungsten (green): Works well with AC for aluminum
-
Thoriated (red): Good for DC with steel and stainless
-
Ceriated (orange): All-purpose electrode with good arc starts
-
Lanthanated (blue): Similar to thoriated but without radioactive material
The electrode tip shape matters too. For AC welding, you want a rounded tip. For DC, a pointed tip works better.
Always grind tungsten lengthwise, not across. Electrodes come in sizes from 0.5mm to 6.4mm (0.020" to 1/4"). Thinner electrodes work better for detailed, low-amperage welding.
Know more about the types of arc welding by reading our guide: AC and DC Welding: Understanding the Differences.
Gas Nozzle/Ceramic Cup Types and Sizes
The gas nozzle, also called a ceramic cup, directs shielding gas around your weld. Cups come in various sizes, usually numbered #4 (1/4") to #12 (3/4").
Smaller cups (#4-#6) give you better visibility and work in tight spaces. Larger cups (#8-#12) provide better gas coverage for bigger welds.
Most cups are made from alumina ceramic. These can break if dropped but handle heat well. Some premium cups use lava rock material that resists cracking better.
Cup shape matters too:
-
Standard cups are good for most work
-
Gas lens cups improve gas flow for better coverage
-
Stubby cups help reach tight spots
The right cup size depends on your joint access, amperage, and gas flow rate. As a rule, use larger cups with higher amperage.
Back Cap and Gas Control Components
The back cap screws onto the rear of the torch body. It applies pressure to the collet system and protects the tungsten from the back side.
Back caps come in different lengths:
- Short: For tight access areas
- Medium: General purpose
- Long: For better tungsten extension control
Inside the torch, the gas diffuser helps distribute shielding gas evenly. This creates smooth, turbulence-free gas flow around your weld puddle.
The gas lens is an optional component that fits between the collet body and cup. It contains fine mesh screens that straighten gas flow. This creates better gas coverage and can reduce gas consumption by 20%.
Gas control happens through the torch body via internal passages. These connect to the gas hose from your machine. Some torches have valves built into the handle for quick gas adjustment.
Connection and Assembly Diagram for TIG Torches

Photo source: Weld Class
Setting up a TIG torch correctly involves connecting multiple components that work together during welding. Proper assembly ensures good performance and safety while welding.
First, assemble the collet and collet body before inserting your tungsten electrode, ensuring a tight fit for good conductivity. Insert the back cap into the torch body (without tightening), add the tungsten/collet assembly, then attach the nozzle.
Position the electrode approximately ¼ inch beyond the nozzle end before hand-tightening the back cap.
For gas connections, attach the gas hose from your torch to the regulator using proper fittings, ensuring all connections are secure to prevent leaks. The typical flow follows this path: gas tank → regulator → power source → torch cable → torch head.
When installing water-cooled models, proper hose connections are crucial - blue output water hose to cooler, red return/power cable to power adapter, and black gas hose to the appropriate receptacle.
Remember, tight connections prevent conductivity problems and gas flow issues that could damage your torch or compromise weld quality
Final Thoughts
Understanding your TIG torch diagram is essential for successful welding projects. Proper assembly and connection of components—from tungsten electrode to gas lines—ensures optimal performance and weld quality.
With ArcCaptain TIG torches, attention to detail during setup translates directly to better results. Remember to verify all connections are secure before beginning any welding task.
Ready to elevate your aluminum welding skills? Discover the perfect match for your projects in our expert guide: The Best Tungsten Electrode for TIG Welding Aluminum.
Frequently Asked Questions
Where can one find a detailed TIG torch parts breakdown?
You can find detailed TIG torch parts breakdowns in several places. The manual that came with your torch usually has diagrams.
Manufacturer websites often have downloadable PDFs with parts lists. Welding supply stores also provide parts breakdowns to help you order the right replacement parts.
Some online forums and YouTube channels offer visual guides that show torch components.
If you need specifics for maintenance, contact the manufacturer directly. They can send you the most accurate information for your torch model.
What is the function of the insulator in a TIG torch?
The insulator in a TIG torch keeps you safe by stopping electricity from flowing where it shouldn't. It sits between the tungsten electrode and the torch body.
Without a good insulator, you might get shocked while welding. This part also helps focus the welding arc for better weld quality.
Insulators are usually made of ceramic because it can handle high heat. Replace your insulator if you see cracks, as damaged insulators can cause poor welds and safety issues.
How do you identify various TIG torch parts and their names?
Look at your torch manual to learn part names. The main parts include the gas nozzle (cup), collet, collet body, back cap, and tungsten electrode.
The gas nozzle directs shielding gas to protect your weld pool. The collet holds the tungsten electrode in place. The collet body connects the collet to the torch.
Take your torch apart carefully and match pieces to diagrams. This hands-on approach helps you learn the parts better and makes troubleshooting easier.
What determines the polarity setting for a TIG torch in welding?
The metal you're welding mainly determines polarity settings.
For aluminum, you'll use AC (alternating current) to clean the surface while welding.
For steel and stainless steel, DCEN (Direct Current Electrode Negative) works best. This pushes heat into the workpiece instead of the tungsten.
Your welding machine should have polarity settings you can adjust.
Wrong polarity can cause poor penetration, ugly welds, or tungsten damage.
Always check your settings before starting a new project.