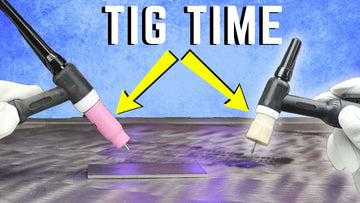
Introduction: Embarking on the journey of TIG welding? Look no further! In under 15 minutes, we're simplifying the process for you, breaking down the essentials, and offering a glimpse into the world of TIG welding. I'm MechMas, and together, we'll dive into the basic setup, equipment, and techniques to get you started on your TIG welding adventure.
The Bare Bones Setup: Let's start with the basics. For a minimal setup, you'll need a welder, gas, regulator, tungsten, filler rod, and a TIG torch. If you've got a DC or inverter-style stick machine, excellent – that will work perfectly. Ensure you have 100% argon gas; the C25 mix won't suffice. Consider sourcing welding gas supplies locally for cost-effectiveness.
Tungsten Exploration: Tungsten comes in various colors, each representing a unique composition. Forget about matching colors to materials; focus on finding tungsten that handles both AC and DC. A personal recommendation is the versatile chartreuse tungsten. Remember, choose the diameter based on your welding needs – thinner for smaller projects, thicker for substantial work.
Filler Rod Essentials: When it comes to filler rods, simplicity is key for beginners. Opt for ER70S-2 for steel welding. Keep it middle-of-the-road with a 3/32 diameter – a general-purpose size that's versatile for various applications.
Choosing the Right TIG Torch: Starting with a 17V TIG torch is a wise move. The "V" signifies a valve, allowing easy control of gas flow. Ensure the torch matches your machine's connection type. Most commonly, you'll encounter a 17V torch with a standard connection. Thread the torch, adjust the back cap, and attach the appropriate collets and cups for your tungsten diameter.
Machine Upgrade: Dedicated TIG Welding: Ready to level up? Consider investing in a dedicated TIG welding machine for a richer welding experience. AC/DC machines open doors to aluminum welding opportunities. Look for adjustable settings like pre and post flow, up and down slope, and AC balance for precise control.
Starting the Arc – From Scratch to High Frequency: For Bare Bones setups, be prepared for a scratch start. Transitioning to a lift start is an improvement, where you touch and pull away to initiate the arc. The pinnacle is a high-frequency start, offering a seamless beginning with just a trigger pull. Don't forget the foot pedal, allowing nuanced amperage control for impeccable welds.
Tips for Technique: As you begin welding, adopt a 90-degree approach, clocking back 10 to 15 degrees for better visibility. Experiment with push-style welding, maintaining a steady hand and practicing various patterns. Investing in a stubby gas lens kit enhances maneuverability in tight spaces and provides better visual clarity.
The Arccaptain TIG Machine – An Introduction: It's worth noting their TIG machine as a great entry-level option. Offering adjustable settings, it provides an affordable yet feature-rich solution for beginners.
Conclusion: Armed with this knowledge, you're well on your way to mastering TIG welding. Whether you stick to the basics or explore advanced machines, the key is practice. So, gear up, experiment, and enjoy the artistry of TIG welding. I'm MechMas, signing off until our next welding adventure. Happy welding!
